
Chumash, California
TRACCE no. 11 – by R. Paul Firnhaber
I had a photographic exhibit at the IRAC 98 Conference in Vila Real, Portugal where I displayed images from ten countries on five continents. While in last minute preparations for this exhibit, I decided to also include a number of prints that were made from digitized slides enhanced in Adobe PhotoShop and printed on my desktop printer.
![]()
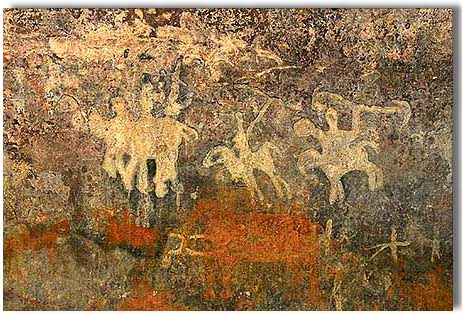
Begby, Ostfold, NORWAY
These were presented as a loose array on a table and included a sheet that read,“(This) experiment is meant to suggest an alternative to expensive, hand-made archival prints for some exhibits and other potential uses. Vulnerable (unprotected; subject to the risks of handling, etc.) and disposable (extremely inexpensive and thoroughly un-archival) these prints may also represent an alternative paradigm in returning the art back to the risks of democracy and natural elements. YOU MAY TOUCH AND HANDLE THESE PRINTS.”I have been invited to share my “technique” in TRACCE.
Some preliminary considerations
- Rather than attempt to create a manual on this issue, I will describe what I do specifically with my hardware and software to achieve a high-quality printed image. Hopefully this will provide a basis for you to start and to achieve similar results.
- Enhancing or manipulating images in the computer is sometimes thought to be too subjective to be applicable to rock art studies. I feel that manipulation is an extremely important aspect of rock art work today. I see image manipulationas working with the various components that effect the optimal rendering of an original image. In other words it is equivalent to utilizing the best knowledge, skills and tools possible when one captures an image in a traditional way, such as camera setting choices, lens and film choices, light condition choices, etc. The computer has simply enhanced one’s ability and extended the process farther than traditional methods, often with better results.
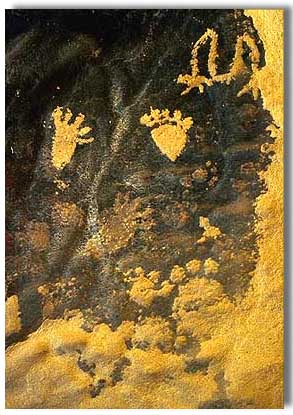
Bhimbetka, Madhya Pradesh, INDIA
- One of the most important aspects of dealing with any image is to analyze problems and address them to create solutions. It is possible to learn how to see what might be wrong, and then how to use the computer to address and correct it. There is no magic in creating good images; one has to (and can) learn how to do it.
- The photographs that accompany this article are too low in resolution to be downloaded and printed. They work for web pages, but precious little more. These average 300KB in file size. For an adequate 5 X 7 inch printed image a minimum of 9-12MB is necessary, 30-40 times more data.
- Hardware and software. My computer has a 300 MHz Pentium processor with 64MB of RAM. I use a Hewlett-Packard DeskJet 855Cse color printer. My graphics program is Adobe PhotoShop 4.0 . For image work, the processor speed and RAM are key, and must be reasonably hefty to do the job. Any good color printer on the market today should work reasonably well. PhotoShop is, I think, the graphics software of choice when dealing with images, however PaintShop Pro is quite adequate and several good but inexpensive graphics programs are available as well.
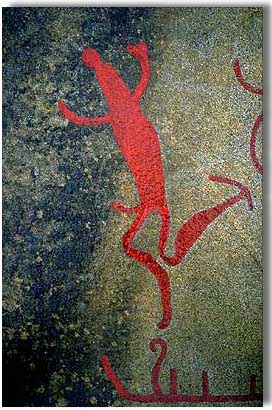
Chumash, California, US
Steps in processing and printing images
- Choosing an image. All images do not work equally well regardless how you are processing them. Choose images that don’t suffer from too much contrast, from being too flat or dull, that possess color shifts or imbalances, or have sharpness problems. Even though the computer is capable of dealing with significant problems, choose images that look good without major manipulation. Underexposed images work better than overexposed; there is more data to work with. And if a particular image isn’t working for you, abandon it (if you can!) in favor of another.
- Scanning the image. The two options for scanning a 35mm slide are, a) do it yourself with a reasonably good desktop slide scanner, or, b) purchase inexpensive Kodak Photo CD scans (US$ .79 – 2.00 each). Obtain a scan, if doing it yourself, in the range of 2200 X 1500 pixels per inch (ppi), or, if using a Kodak PCD scan which incorporates 5 resolutions, choose the 1536 X 1024 ppi scan for 5 X 7 prints or the 3072 X 2048 ppi scan for larger prints. Open the image in your image editing software.
- Manipulating the image. First, crop to create a composition and eliminate redundancies, then size your image to final dimensions. Next analyze your image. Look for overall color shifts, imbalanced colors, dullness or flatness, and sharpness problems. I begin, in PhotoShop, by looking at the image’s histogramto see how well balanced the values are. I try an auto levelsmove, but with rock art, this seldom works because the typical blue sky and green grass landscape components are missing. So I go to contrast/brightnessand tweak both until the image starts to snap. Play with it. And work in small increments. Then I go to color balanceand correct any off colors or enhance good colors. Again, use moderation. Finally, I will apply a slight amount of the unsharp filter. This is adjustable, so try a bit to see what works. Sometimes I may add some noise(filter) before I unsharp.Experiment and see what works for your image. There are other procedures and techniques that may be applicable, but try to stick with as few maneuvers as possible.
- Printing the image. Print the image at the highest resolution/quality your printer will produce, usually around 600 dpi. Paper options are small. Some prefer the high-gloss (expensive) photo-quality papers, but I like a matte finish and use the quite inexpensive (about US$ .10/sheet) “Matte Coated Ink Jet Paper.” Test your paper; some allow the ink dots to bleed and are not adequate for this use. You will probably need to re-adjust after printing a test print. Normal procedure.

Deighton River, Cape York, AUSTRALIA
No magic here. And certainly nothing foolproof. But with some basic hardware, some reasonable skills, and especially while learning, quite a bit of time spend in reading, experimenting and trial-by-error, some exquisitely fine prints can be produced from your slides.
R. Paul Firnhaber
Imaging for Cultural Conservation
Estes Park, Colorado 80517 USA


back to index TRACCE no. 
![]()
![]()


Leave a Reply